
Bunny appears to be climbing out
of the box in
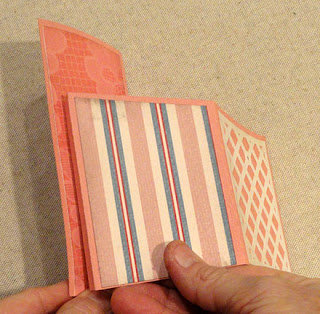
this dimensional card
(approx 2.75" wide x 2.75" deep by
5.875" tall open)
which folds flat for sending,
opens into box tube form for display.
opens into box tube form for display.
Two bridges hold grass sections (#1), and
three layered Easter eggs (#2).
ASSEMBLY: 1. Identify and cut the shapes:
A main box side/front with lattice & side accents
B main box side and back with side & inside back accents
EASTER word cut (not labeled)
C side flaps with accent overlays
D bridge #1 (front) with grass sections
E bridge #2 (back) with eggs & overlays
F bunny body with under body (ear contr) base
G head with nose, whiskers, paws
H eye contrast underlay

 4. Position and attach the accent panels:
lattice on the outter front (line up punch hole) and sides
by centering to allow an offset margin on top
and sides, aligning bottom edges.
 5. Position and attach the back accent panel
on the inside back panel of the base in
similar manner.


 9. Layer the tag, then attach (optional glue)
to the front of the box with punch holes aligned,
also position and attach "EASTER" at the top
of the back panel.
Attach decorative mini brad through punch holes.


 11. Prepare the back bridge (#2) be bending back
side tabs. Layer the three eggs and their
decorative overlays.
12. Position the two side eggs over the
matching bridge shapes and attach, then
position the center egg between with the
bottom edge overlapping the top arch
of the bridge just enough to get a good connection.


 On the back of the head, position and attach
the eye contrast underlay so that the eye holes
are covered.
(NOTE: blue shape was replaced in the final sample
project with darker color for stronger contrast.)


 Position bunny assembly behind the card front
panel, sliding it downward until the side guidemarks
are even with the box top edges,
and overlapping portions together.


 . . . then pop it into box shape for display.

A main box side/front with lattice & side accents
B main box side and back with side & inside back accents
EASTER word cut (not labeled)
C side flaps with accent overlays
D bridge #1 (front) with grass sections
E bridge #2 (back) with eggs & overlays
F bunny body with under body (ear contr) base
G head with nose, whiskers, paws
H eye contrast underlay

2. Prepare the main box shapes by bending back
at the vertical perforation lines between panels
and at tab/flanges.
3. Join the two main shape halves by overlapping
the side/back straight edge at the opposite tab
perforation line, adjusting so that bottom edges
line up, and gluing in place.

lattice on the outter front (line up punch hole) and sides
by centering to allow an offset margin on top
and sides, aligning bottom edges.

on the inside back panel of the base in
similar manner.

6. Form the base into a tube for the box shape,
to bring the left back side tab perforation fold
to line up with the side edge of the opposite
back, and join the seam, taking care that
bottom edges are aligned.
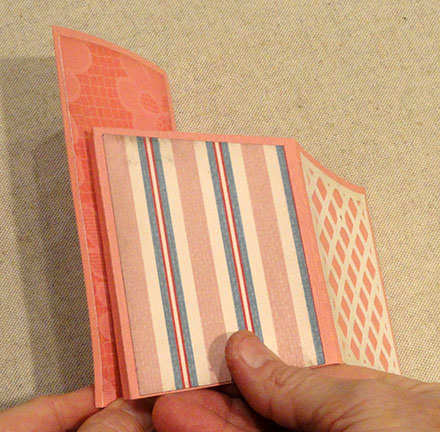
NOTE that the symmetrical shape of the box tube
will allow it to be flattened as shown here
so that finger pressure can be thoroughly
applied along the seam.

7. Prepare the flaps by bending back the top tab.
Position and attach the flap accent shapes
to the flap base for left and right flaps.
8. Position and attach each flap tab
along the top angled side edge of the
box base.

to the front of the box with punch holes aligned,
also position and attach "EASTER" at the top
of the back panel.
Attach decorative mini brad through punch holes.

10. Prepare the #1 bridge by bending side tabs back.
Position the front double grass shape on the front
of the bridge, between the widest-apart position
hash cuts near the bottom edge.
Bottom straight edges of each should line up.

Position and attach the single grass section
on the backside of the bridge
(shape front is turned so that it will be
seen from the front of the card)
centered between the two middle hash cuts.

side tabs. Layer the three eggs and their
decorative overlays.
12. Position the two side eggs over the
matching bridge shapes and attach, then
position the center egg between with the
bottom edge overlapping the top arch
of the bridge just enough to get a good connection.

13. With tabs bent back, position the back bridge
into the box interior shape so that it is
approx. 1/3 of the distance forward from the
back panel, and parallel to the front and back.
Top edges of tabs should line up with the
flap crease of side panels.
Glue bridge tabs to the inside sides of
the box base. Before the glue has completely dried . . .

. . . fold the box assembly into its flattened shape
and apply finger pressure through the layers
in the areas where the bridge tabs are being
attached. This will allow the bridge to "self adjust"
slightly so that the box CAN be folded flat in the end.
(Perform this step after the front #1 bridge
is attached also.)

14. Insert the front bridge into the box interior space
in the same fashion, positioning it half way
forward between the back bridge and the box front.
Align the tab tops and adjust to make sure it is
parallel as for the previous bridge, then
attach side tabs, and press flat as before.

15. Prepare the bunny body by layering the
ear "show-thru" underlay base and the body front
as shown on the right. Also attach nose (bottom
aligned at position guide mark on head) and whiskers
to head.

the eye contrast underlay so that the eye holes
are covered.
(NOTE: blue shape was replaced in the final sample
project with darker color for stronger contrast.)

16. Position and attach the head to the body base
assembly by lining up head and base head area
edges that match up.

17. NOTE the position markings on the
body "front" shape near each side edge.

panel, sliding it downward until the side guidemarks
are even with the box top edges,
and overlapping portions together.

18. Position and attach the paws as shown,
just inside of the front side panel corners,
with top edges slightly above the panel top edge.

The box card is now complete.
Fold it flat to fit into an oversize envelop . . .


No comments:
Post a Comment